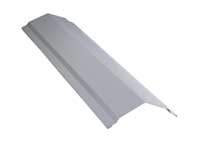
Metal roofing ridge cap is the trim placed along the roof’s ridge – the peak, where two roof slopes meet up.
A ridge cap is normally installed only after all metal roof panels and any other trim are in place. In other words, it’s put on last – the cap to the job.
Most ridge cap comes in pieces 10’6” long. They are meant to cover 10’ of ridge, with 6” of overlap between pieces.
 Metal Roofing Closures
To keep debris, insects and blowing rain from getting in under the gaps between the panels and the ridge cap, closure strips are used. Closures come in two types: solid and vented.
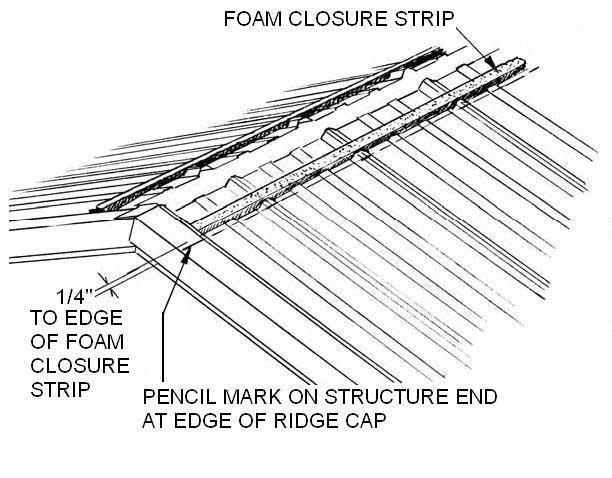
Solid closures – also called “outside closures,” are normally made of dense foam material. They come in 3-foot-long pieces, designed to fit closely over the ribs of the roof panels. They are placed end to end and secured along the edge of the top row of panels, where panels and ridge cap will meet. Each piece is also designed to interlock with the next. Joined up end to end, they form a continuous, watertight, airtight barrier.
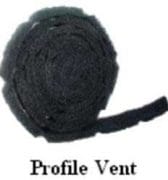
Vented closure or “profile vent” has a similar profile to solid closures – matching the ribbed pattern of your roof panels. One common type is 3” wide, and comes in 50’-long rolls. Vented closure helps prevent bugs and water from getting in, while allowing hot air to easily escape from the attic.


Metal Roofing Ridge Cap – Installation Steps
- Center a piece of ridge cap on the building peak. Make a mark at the cap’s lower edges (both sides), at one end of the ridge. See the illustration below.
- If the ridge is only 15’-20’ long, repeat step 1 at the opposite end of the ridge. For a longer ridge, move along the ridge repeating step 1 every 15’ or so, until you reach the opposite end.
- Set the piece of ridge cap aside, and snap a chalk line between the marks. You should end up with 2 chalk marks – one on each side of the ridge, and running along its full length.
- Following steps a-c below, place outside closure strips (or vented closure) along the full length of the ridge, on both sides of the roof. The edge of the closure should be 1/4″ above the chalk line (that is, 1/4” toward the peak). [Note: Steps a-c give one common method for installing closures. Check the instructions for your roofing system before you start, as they may be different.]
- Run a strip of sealant tape the full length of the ridge, about 1” above your chalk line. Repeat on the opposite side. If there is a paper backing running along the top of the sealant strip, remove it.
- Run closure strips the length of the ridge, interlocking them end to end as you go, and pressing them down on top of the sealant tape.
- Run another strip of sealant tape along the top of the closure strips. Leave any paper backing in place, for now.
Vented closure is installed in much the same way, except that it is unrolled rather than laid down in 3’ pieces.

5. Starting at the end of the ridge where the first panel was installed, install the first piece of ridge cap.
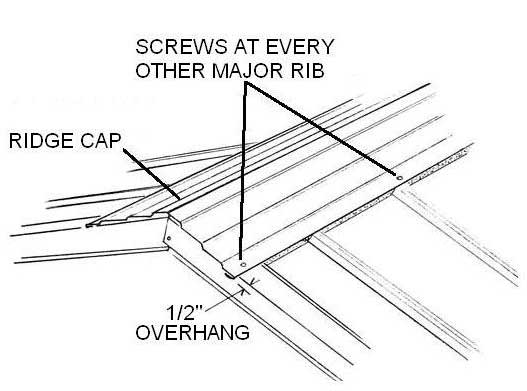
- Check the design and instructions for your specific roof, to see whether the ridge cap should be placed flush with the end of ridge, or with an overhang. In the example illustration below, the ridge cap is shown extending ½” beyond the edge of the roof.
- Without allowing the ridge cap piece to touch any exposed sealant tape, center it squarely on top of the ridge, using the ridge itself and the chalk lines you made earlier as guidelines.
- Once you’re sure you have positioned the ridge cap correctly, set it down on the closures, and press it downward to ensure good contact.
6. Fasten the ridge to the panels below. In the example illustration below, screws are placed so as to go through the center of every other major roof panel rib. You’ll need to consult the instructions for your specific roof for such details.

7. Lap the next piece of ridge cap 6″ over the first, and repeat steps 5 and 6.
8. Continue on down the ridge until you reach its end. It may be necessary to trim the final section of ridge cap to fit your ridge length.
Other Metal Roofing and Ridge Cap Types
The steps above explain steel roofing ridge cap installation for the most common metal roof and cap designs. There are other types as well, such as standing seam and shingle-style panels, vented ridge cap, skylight ridge cap, and formed ridge cap. Details of how to install these special types are given in the instructions that should come with them, and in other articles.
For more metal roof installation information, visit Metal Roofing Source
Please call us toll-free at 1-877-833-3237
with any questions or quote needs! We are here to help.
Customer service and pricing available from 8:00 am to 5:00 pm MST Monday – Friday.

 Metal Roofing Closures


