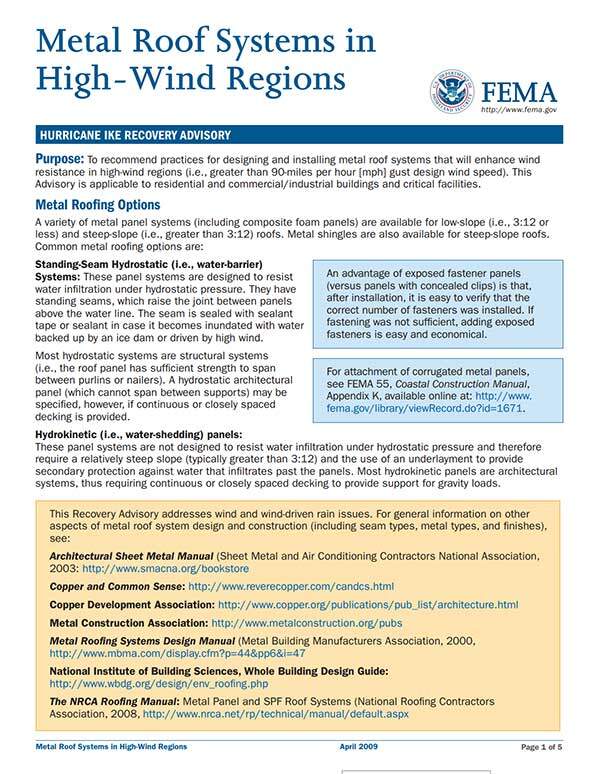
Metal Roofs: FEMA’s Hurricane Recommendation
After Hurricane Ike battered Galveston, Texas in 2008, FEMA issued a report recommending the installation of metal roofs, but with an overtone of caution, too. See, metal roofs aren’t inherently hurricane-proof; no roof is. How a metal roof is installed, though, has a huge impact in whether it’ll ride out high winds or not.
FEMA’s document includes a photo of a metal-roofed building that survived 170 mph winds under Hurricane Andrew, losing just some hip flashing, which proves a well-installed metal roof does have some serious staying power.
Among the “what not to do” tips in FEMA’s report outlining the metal roofs that failed during Ike include using clips too far away from the eaves, not using enough fasteners, spacing fasteners too far apart, not buying a roofing system that meets the design uplift load needs, and other oversights.
Basic Considerations in Storm-Prone Regions
Choosing the right metal roof comes down to things like roof pitch, building shape, the topography around the building, and even how close it is to the shoreline. Local building codes can help you discern what’s right for where you are. We can help with some information on the right materials for the pitch and slope side of things too.
But choosing the roof is only part of the job. Installing the roof needs to be done in a way that makes you ready to face those heavy winds every day. Standing-seam roofs are generally considered better able to face high winds than through-fastened aka exposed-fastener roofs. Though in theory, even a through-fastened roof could hold up well if it’s been installed with screws with integral neoprene washers – and a lot of them. Storm coasts are no place for nailed-down roofs.
Some Tips for Storm-Proof Metal Roofs
Sometimes, more is more – like when it comes to using clips and fasteners on a metal roof that’ll be standing up to the best the Pacific storm season has to offer.
- FEMA recommends 110-mile-an-hour wind regions look at using two clips along the eaves, ridges, and hips. According to them, the first eave clip should be put within 2 to 3″ of the eave, and the second clip approximately 3 to 4″ from the first clip.
- Use a robust underlayment system to protect against damage in the case any panels do get blown off. (That robust underlayment is also what prevents the roof from being loud during rainstorms.)
- Use heavy-gauge, narrower roofing.
- According to FEMA, “For concealed clips over a solid substrate, it is recommended that chalk lines be specified so that the clips are correctly spaced.”
- For hip, ridge, and rake flashings, use exposed fasteners, and install two rows of fasteners on either side of the hip/ridge line. Space the two rows of fasteners between 3 to 6 inches apart for maximum protection.
- If the roof is within 3,000 feet of the shoreline, stainless steel clips and fasteners are recommended.
- Sealants and adhesives are extremely helpful in creating wind resistance, especially along flashings.
The Most Important Thing
You can install all the fasteners in the world, but if your sub-structural decking and framing isn’t strong enough to stay put when Pacific storms come knocking, it’s all moot. Use thicker wood and/or metal decking. Install sturdy 2×4 purlins (open framing) close together, as this will provide a good base for attaching a metal roof.
Questions? Need pricing?
Please call us toll-free at 1-877-833-3237
with any questions or quote needs! We are here to help.
Customer service and pricing available from 8:00 am to 5:00 pm MST Monday – Friday.


